
The SEO calendar regularly plans new blog posts and guides for your website. The AI finds suitable topics without overlapping your existing content, writes the posts 30 days in advance and sends them to you for approval. Publishing happens only after approval. Here you set up the calendar and decide where the posts go.
Before you start
The more the AI knows about your brand, the better the texts get. So fill in your Brand DNA first.
Set up the calendar
- In the sidebar, open Content and then SEO calendar.
- On your first visit, Set up calendar appears. Later you reach the same settings through Manage automations at the top right.
- Under Posts per week, choose how often a new post should appear.
- Under Publish between, set the time window with From and Until, the times apply to Germany. Each post gets its own time within it. Without an end time, it goes out exactly at the start time.
- Under Weekdays, select exactly as many days as posts per week.
- Enter a Minimum search volume. Only topics with at least that many searches per month are considered, with 0 all topics.
- Under Publishing, choose where approved posts should go (see the next section).
- Click Start calendar, or later Save.
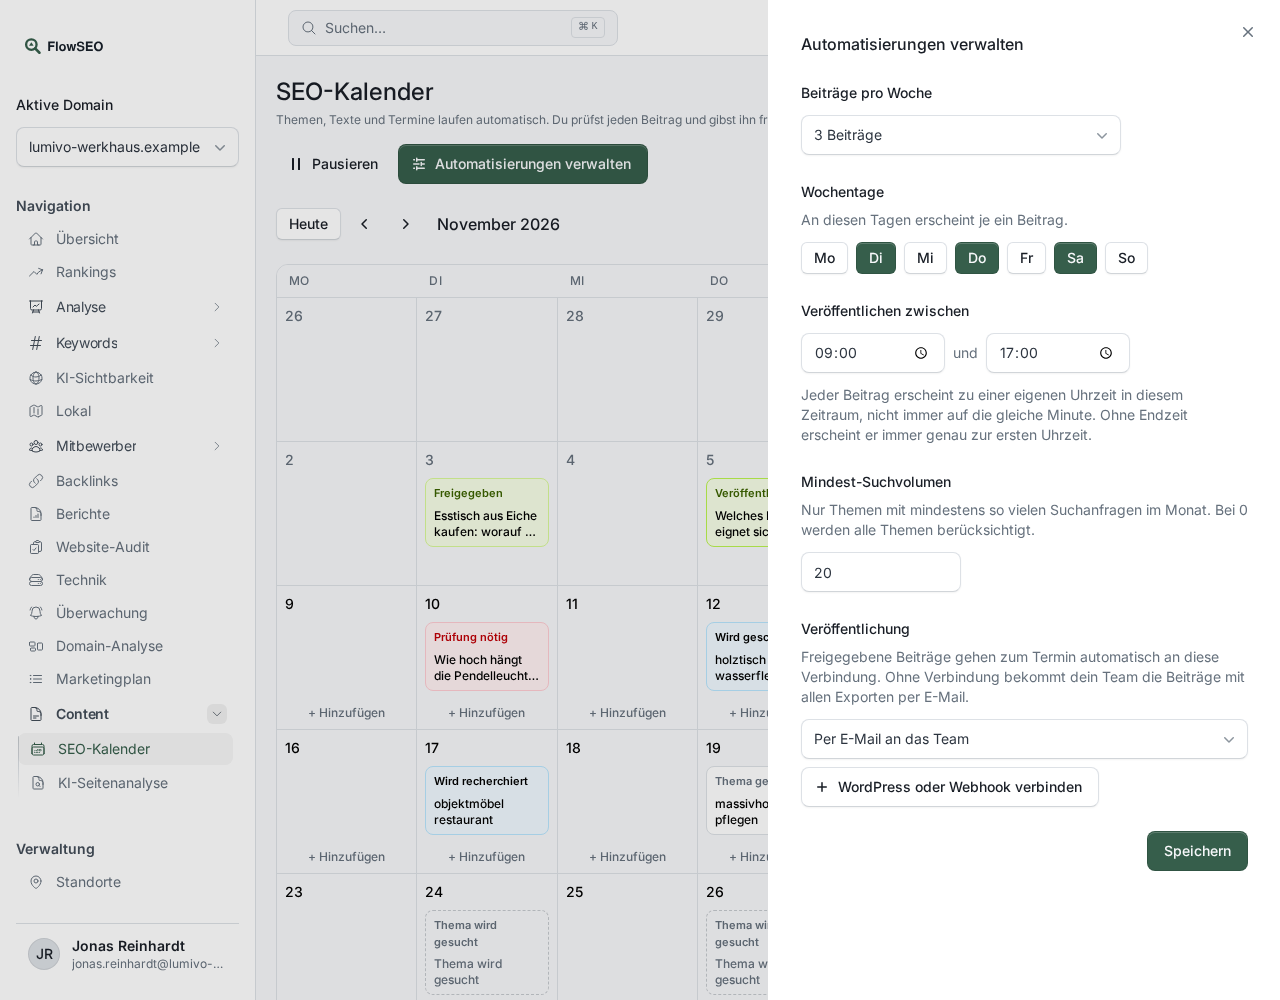
The calendar then plans the next dates by itself. Topics, texts and images are created automatically, you review and approve. How that works is described in Reviewing and approving posts in the SEO calendar.
By email or automatically to WordPress
For email you don't need to connect anything. If By email to the team is selected under Publishing, every team member with FlowSEO access gets the approved post by email on its date, with HTML, Markdown, Word, PDF, the images and the structured data attached. You then put it on your website yourself.
A direct connection to your self-hosted WordPress site is more convenient. For that, you need an application password in WordPress:
- Log in to your WordPress and open Users and then Profile.
- Scroll to the Application Passwords section, enter for example
FlowSEOunder New Application Password Name and click Add New Application Password. - Copy the password shown. WordPress displays it only this once.
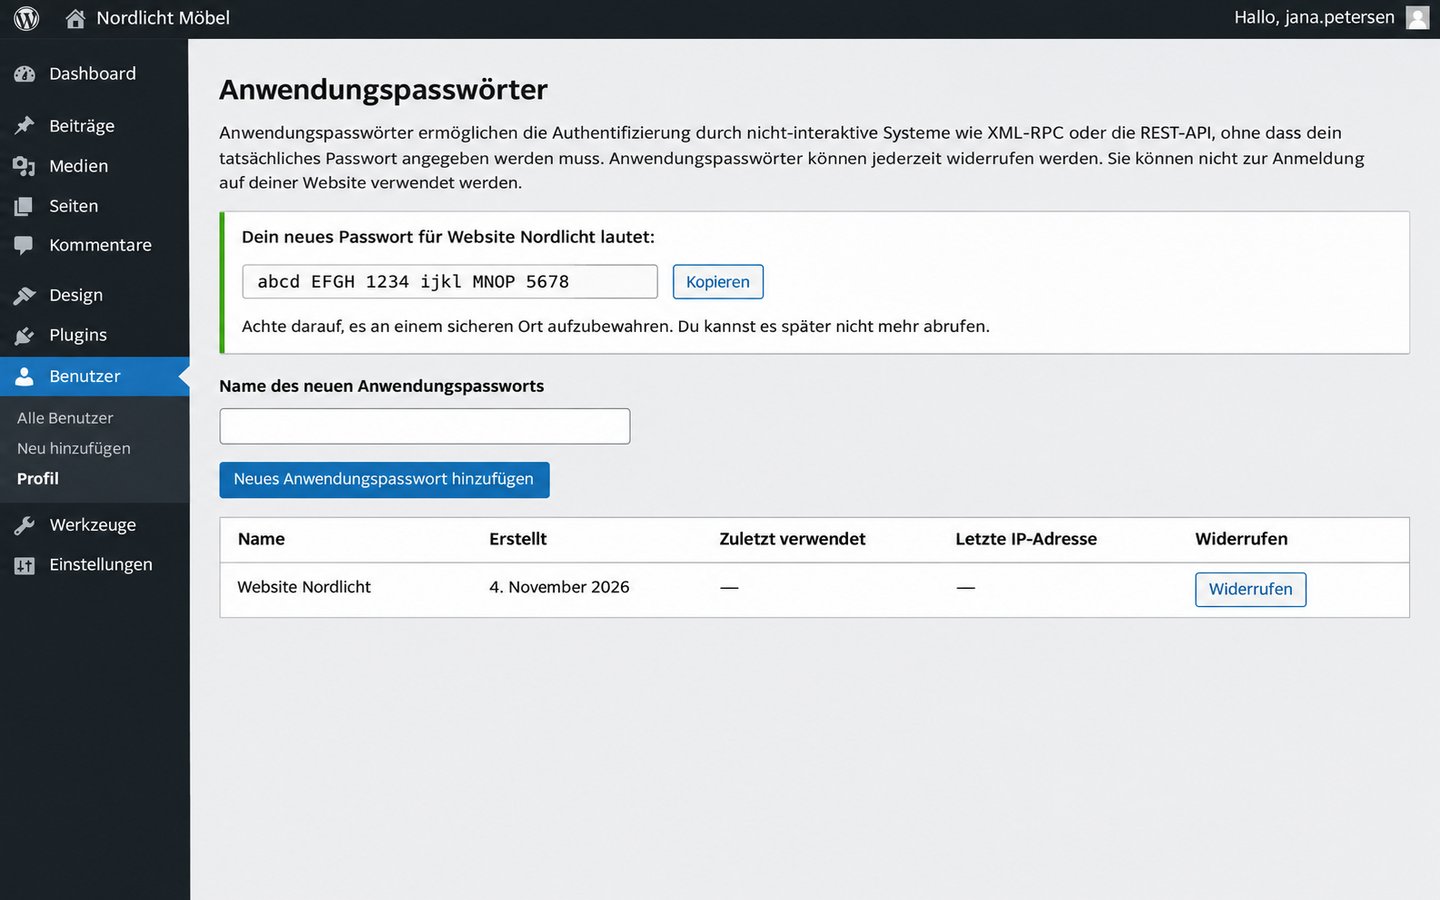
Back in FlowSEO:
- In the calendar settings, click Connect WordPress or a webhook.
- Under Kind of connection, leave the option WordPress selected.
- Enter a Name (optional), the Address of the WordPress site (it has to be on your domain), your WordPress username and the Application password. Don't use your login password here.
- Under Create as, choose whether a Post or a Page is created, and under In WordPress between Publish at once and Create as draft.
- Click Save and check. FlowSEO tests the connection immediately. Our team then sets the WordPress category.
- Select the new connection in the calendar under Publishing and save.
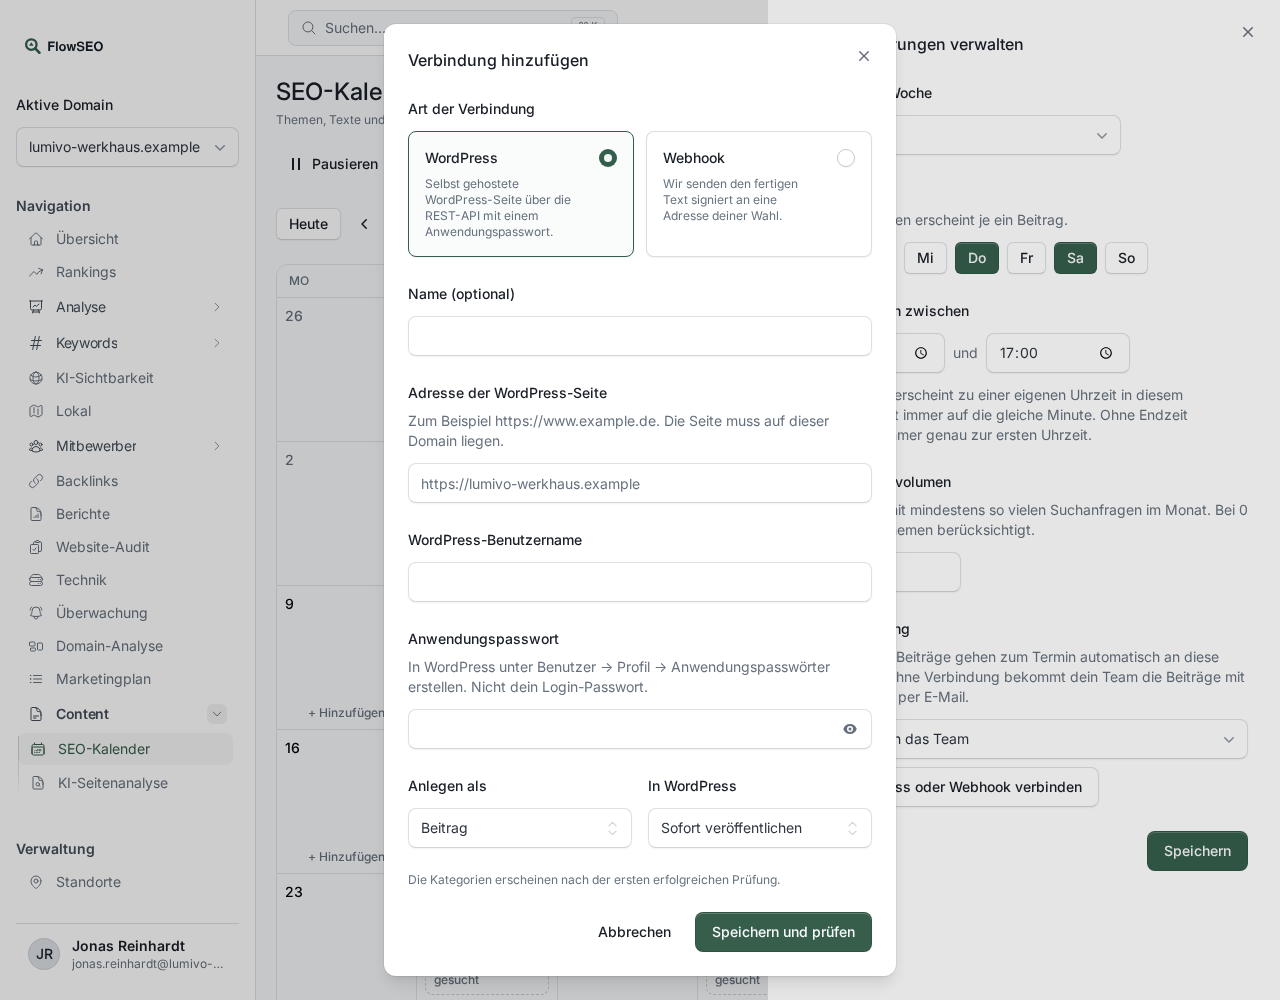
Instead of WordPress, you can also connect a Webhook. FlowSEO then sends the finished text, signed, as JSON to an https address of your choice, see Webhook for the SEO calendar.
Pause and change
With Pause at the top right you stop the calendar, and posts already in progress are still finished. Resume starts it again. If you change weekdays or the time, everything already being written or finished stays. Future dates without text are dropped, and the new dates are planned shortly.
If something doesn't work
- “Please choose exactly … weekdays.”: The number of selected weekdays has to match the number of posts per week.
- The WordPress connection fails: Check the address, username and application password. The most common messages are explained in WordPress publishing doesn't work.
Good to know
- Approval: There is no automatic approval in the browser, even a finished post waits for you. What a connected AI agent may do is described in The “Let AI agents release on their own” switch.
- Taking back a scheduled publication: There is no dedicated button for this. If Revise with AI or an AI agent changes a post that's already approved, the approval is lifted and the post goes back to Review needed. If you don't approve it again by the date, it doesn't go out. If publishing fails because the address is already taken, an image is too large or an image is missing from the media library, the post also goes back to review by itself and needs a new approval. Only our team can cancel the date itself.